Friday 26 January 2018

Birch Bark 'Origami' Pot.


Many moons ago the quarterly Scouting magazine used to be a bi-monthly publication which had a supplement relevant to the section the reader was with. Not only did I get the Cub Supplement but I did a few articles for it, and indeed the main Scouting magazine too. 

This one, for an origami cooking pot, appeared in the August/ September 2011 edition. Back in the day it was possible to link to the article online but all the links are annoyingly now 404 errors which makes me ponder the point of doing them in the first place but I digress...


The above picture is a screen grab from the Scout Association's collection of publications on the Issuu website. As you can see there are only five main steps to making a 'pot' but being a small picture it's hard to see the steps in detail so I'll reproduce them again.


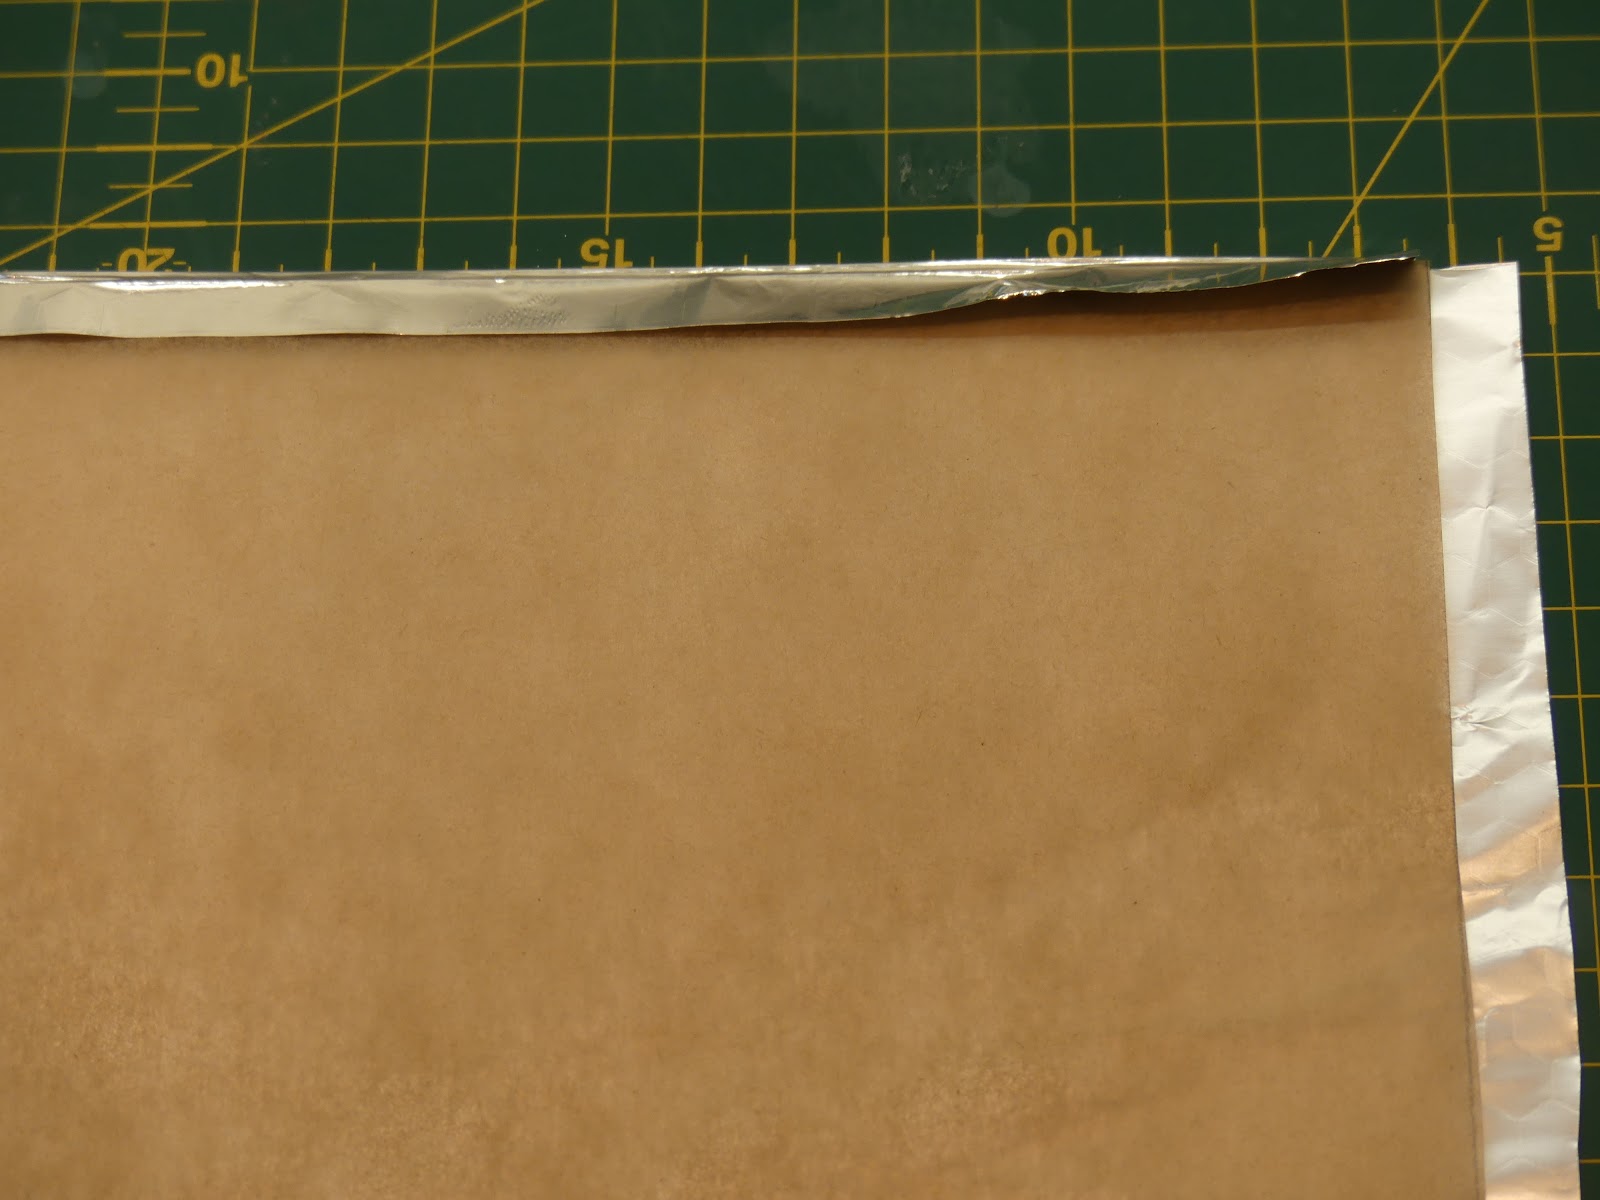
Take a piece of square or rectangular paper, the shape of the paper, of course,  will alter the pot dimensions. I am using origami paper and it is 19 cm x 19 cm for reference. the corner is being turned up in this picture to demonstrate that origami paper is coloured/ patterned on one side, and white on the other.
  

Firstly fold both sides into the middle and score the fold. 


Then fold a small parallel strip on the two folded halves (about 1 cm in this case). again score the folds.
  

Now fold the four corners in (as shown) to where the small parallel strip starts and yes, score well.


Once the corners are folded in fold the strips over so that the corners are secured under them as shown.
   

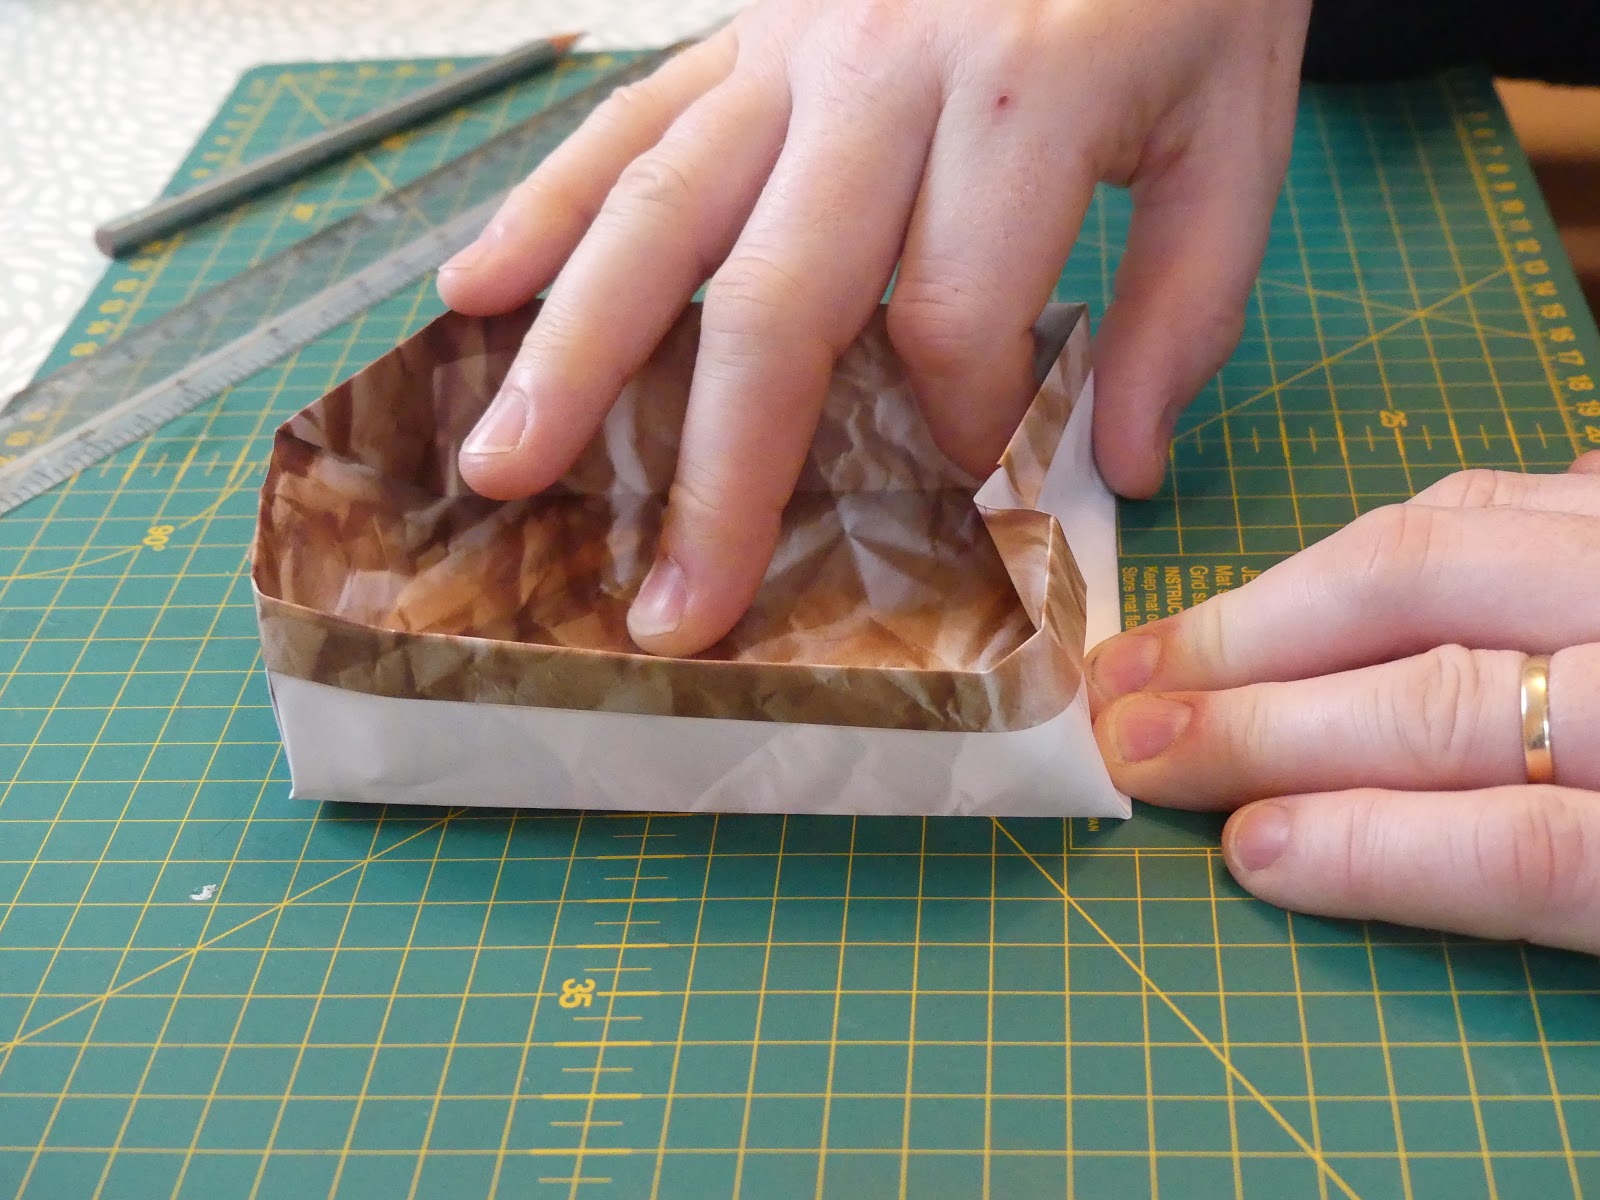
The basic folding is done, now to cajole it into a container. Place your index fingers under both corners inside the pot and your thumbs correspondingly on the outside. Gently tease the corners upright. Once done gently crease along the edge like in the picture.


Repeat on the other side. To help the shape also gently crease all of the corners
  

This will be what your finished pot will look like. This  19 cm x 19 cm piece of origami paper ended up with the length being 11.5 cms, the width 9.5 cms and the depth being 3.5 cms. 


This shape of container can also have a practical use. You can see in the Cub supplement that there is a finished one made out of tin foil, it was OK for finishing off half-cooked chipolatas and the like (if greased) during a Cub meeting but a twin layered container can be made to extend it's usefulness. This is a union of tin foil and parchment (greaseproof) paper with the foil a little larger and cut to the shape of a cross which effectively makes some flaps to fold over the parchment.


Once the foil edges are folded over the pot can be made as above.
  

And this is the finished container with the origami paper one for scale. It started out A4 size and it's vital statistics are L 15 cms W 8 cms and  H 7 cms. it is quite a useful place to store, say, cooked vegetables or potatoes when I am using a Primus pan and need to cook protein or something in a sauce and then add the reserved stuff back in.


There was a reason I chose a piece of origami paper with the 'crumpled brown paper' side as it looks like the object of my doing this blog, I was going to try and make a birch bark origami pot.


I collected copious amounts of Himalayan  Birch bark  (Betula utilis var. jacquemontii) but it was rather crinkly around the edges so I gave it a soak in tepid water,  it seemed to make the pieces more biddable.


After a short while I placed it between some sheets of  kitchen roll with some weight on top to both keep it flat and dry it out.


After it was removed from the kitchen roll I trimmed the bark up into the biggest square or rectangle it is possible to make from each piece.


I sorted through the prepped bark and took the three largest pieces I had and stuck them together to make a birch bark laminate. I then made a parchment paper template to maximise the biggest area. Once worked out I drew little lines across the edges at a right angle and trimmed the bark afterwards using these lines as guides.


So I'm nearly ready to fold it. This is where the origami paper reference kicks in. The bark is darker on the inside surface so there will be a natural contrast in the colour of the sides. Before I started I paid attention to the edges and used PVA glue to seal them. The tactile feel of this laminate was not too dissimilar to the inner bit of a puff pastry pie lid. 


Once glued I paper clipped the edges to encourage a good bond.


And eyes down for yet another origami run through to form a handsome birch bark pot. The flaps that hold the corners in just needed a little PVA glue under them to secure the pot's integrity.


And there it is. Having a three ply laminate gives the pot a lot of strength and this picture clearly shows off the difference in colour between the outer and inner side of the bark. The only downside is that I now need to go  and source some large pieces of Himalayan Birch bark to make some more. Future ones would look good with birch bark pitch gluing the edges and I did consider stitching the rim with artificial sinew for both aesthetic and tensile reasons. This dinky container is length 9 cm, width 4.5 cm and 2.75 cm and height for reference. 

Suggested further reading:-


How To Spot Raspberries

I'm always really  pleased when folk walk past unripe blackberries and don't consume any because I'll gladly hoover them up.

 Well not really, by unripe I mean 'unripe' and not blackberries but raspberries. I'm always surprised when folk say 'You can find raspberries in the countryside?' and that's why I think people just walk by this delicious fruit thinking that the 'unripe blackberries' because it's the only known fruit of this kind to them.

Whilst not professing to be an expert, it's like many things in that once you get your eye in they just stand out a mile. The thing that usually catches my eye is the colour and look of the leaf.


These are raspberry leaves and have an almost lime green colour to them and feel fairly smooth to the touch. 


Compare that to blackberry leaves which are slightly darker and feel rougher and almost leathery compared to raspberry leaves. There can also be some thorns on the main rib on the leaf's underside.


This is the thorny bramble...


Talking of thorns...Anyone who has bushed past a bramble patch will be well acquainted with the multitude of thorns down the long lengths of a bramble (see the bramble leaf picture above).

A more delicate Raspberry cane

Raspberries have more dainty looking stems that can have no thorns, some small but barely raised thorns or slightly longer thorns that are very flexible and almost rubbery and are sometimes red. Suffice to say raspberry canes need to up their game because they are next to no deterrent. If you look closely at the base of the stem in the above picture you'll see some red thorns.


If you still aren't sure that you've hit raspberry cane gold then turn the leaf over.  It is always this rather nice grey/ green colour and whilst blackberries can sometimes display this hue it's not 100% of the time (there are apparently dozens and dozens, if not hundreds of blackberry subspecies). This picture also shows off the delicate raspberry leaf and no thorns.


This shot shows off he lime green top surface and the grey/ green underneath perfectly.


The above two shots show raspberries after the flowers have set and the fruits forming.


And here's a shot of some blackberries for comparison. 


 Scottish raspberry

This bounty of fruits is a crop of Scottish Raspberries (from Galloway), a county that sees favourable growing conditions for them. I also recall going to view Ospreys in the ?Lake district and the car park being full of them too.

Raspberries aren't always that big and can be hard to harvest intact if very ripe. I've also noticed that there can be a little variation in fruit size but not as much as blackberries. The biggest size difference is that between a wild strawberry and a commercially grown fruit. Even if there is no fruit to be had then you'll hopefully know what to look for and  will therefore know  to revisit.

I'm going to finish on blackberries-If in the late Summer or Autumn you find some blackberries with a grey hue then you've possibly found Dewberries.


Sunday 14 January 2018

Atl Atl Quiver v 2.0


After a Will Lord 1-2-1 day in my sabbatical during which I made  an atlatl dart and launcher (as well as knapping) I decided to get myself sorted and set about making some more of my own atlatl sets. As an opener to an evening of making  Dutch arrows at Cubs I showed them the afore mentioned atlatl paraphernalia. 


As you can see, our HQ has a decent field to play with such 'toys'. To show them off and indeed protect them I decided to make a 'quiver' out of a small cardboard tube I had in my garage. It was a tight fit but nevertheless served a purpose and looked rather good, even though I say so myself.


A few months later the place where I work had a massive refit and one of the work men was using a wider tube to store conduit and the like in. I asked if I could have it when finished with and was practically the guys second shadow to make sure I secured it. As you can see in the above picture the newer tube was a sizeable upgrade on the the first tube but equally it wasn't too much bigger so's to be unwieldy. 


The new tube however was rather long and needed cutting. I decided to make the new quiver a little longer than the original one by about six inches. The chosen length was also waterproofed at the base with fence preservative too.


Despite the fact that the ends had a plastic lid like the first one, I wanted to have a more natural looking stopper. I had a load of Cedar wood offcuts after making a bow drill set out of the said wood (see the Cedar wood bowdrill blog here) that went with me on  my recent (and first) visit to  Lee Valley Almost Wild campsite  as kindling and the above piece survived as I decided to keep it for the base.


The wooden disc was inserted into the lid with PVA glue  and clamped overnight, then stuck into the tube and secured with a couple of small nails in the side.


I'd recently collected a large amount of Himalayan Silver Birch bark which is more readily available and indeed more flexible than our native Silver Birch. This was to be utilised as a natural looking covering on the tube to give it the look of a branch that had been hollowed out. Any spare would make great fire lighter just like the bark from it's indigenous relatives.


I started gluing the bark on at the base (using PVA adhesive) with the edge overlapping the end so that I could cover it later.


Once the initial bark was glued on and dry the bottom was then finished off with a leather disc which again was nailed to the base. This not only hid the plastic rim of the lid, but also the rough edges of the wooden disc.


This is what it finally looked like with the nails in place, as well as looking good it will help to repel moisture if used in damp conditions. Once the base was finished there was no avoiding the labourious stage of gluing bark onto the rest of the five foot tube piece by piece. There are several layers to bark and either needed thinning out or gluing together before adding to the tube. it also took time to get the colours and layers blended to look au natural.


Despite the more biddable nature of this type of Birch bark it often wouldn't play ball which would necessitate me stopping and using elastic bands and sometimes clamps to tame wayward pieces. any that looked a bit unnatural once glued where easily softened and blended by sticking a smaller strip over the edges. It is at this point that you may realise that the sticking really does take a while!


As I've just mentioned blending the colours it leads nicely onto finishing the top. The bark is often darker when turned upside down and I decided to finish the top end of the quiver off by lining as much of the inside as possible with 'white' bark and then but the darker stuff around the rim. As it went on it actually looked a little bit like leather.


I was overlapping each piece and had left the first piece half stuck so that the final piece could be positioned under it's edge. I'd always intended to run a long thin piece around the bottom of the bark to hide the edge but having seen how good it looks I wish I'd lined them all up a little better and then been able to use a thinner bark strip.


And this is it with the strip in place. This had come out better than I'd imagined, especially as I'd just finished my first quiver off with white bark. You can compare the tops in a later image.


I also stuck some white bark in a little way down the inside of the tube. This is quite fiddly to do but I wasn't planning to go a long way down as the darts will be in situ to hide the cardboard that is visible further down. As with the outside I tidied up the darker bark edge with a bark strip.


This picture perfectly shows what I consider to be a better height, diameter and top finish on the newer quiver. 


And onto the carrying strap for the quiver. I was going to fashion a similar  setup to the original using old settee leather, brass eyelets and paracord. I experimented  with dying the rougher inner of the leather with fence preservative to see what it looked like, I liked it but felt is was a little dark for this project.


I measured the strips used on quiver number one and cut out two similar sized strips for the newer one. I have tried using my fit-for-purpose leather marking wheel on  this soft leather before but in my experience it tends to give a little too much, hence the primitive fork to mark out the awl spacings.


To aid the process I stuck the leather onto the tube with some more PVA glue and then put a length of artificial sinew (which I used to actually stitch them with) through one of the holes and used a clamp to secure it.


I used, not too surprisingly, saddle stitch to secure the leather. For the uninitiated this involves a needle on each end and a sort of figure of eight pattern of stitching is used. 


When saddle stitch is started or finished the stitching starts and ends three or so holes from the start or finish. As you can see in the above right hand picture the stitching is actually finishing near the middle which is to help secure the thread.


Before gluing the second one I mounted it dry to check that I'd go the correct orientation with the first one.


Once both straps where dried and stitched I finished them off with  brass eyelets and then used a desert camo paracord length (paracord knitting article here) which I've tied using an anchor bend which is a more secure round-turn-and-two-half-hitches. I may change this to a bowline though as it doesn't have the working end sticking out. I also trimmed up the leather to make it level were applicable too.


Once both straps were finished I thought I'd roughly weigh it and it came out at just under 3 pounds.


One final bit of embellishment I had in mind was to attach a crotal bell to it, . Their first use was as adornments on horse tack as early as the 13th century but equally they also used to be attached to animals like pigs when left wandering in woods which is what probably gave me the connection to it being used on this quiver, as well as liberating it from a drawer. The one pictured looks like it could have been made anywhere between the 16th to the 19th century according to this website so may well have been used on livestock.


I initially tied the bell on using a piece of paracord inner cordage and then finished off with copious amounts of  Lime bast cordage near the faux leather birch bark near the top. I may add a length of beads near the bell in the near future as a bit of embellishment on the initial embellishment but otherwise it's job done and I'm rather pleased with it.

Suggested further reading:-

Homemade Atlatls and Dutch Arrows

Will Lord 1-2-1 Day